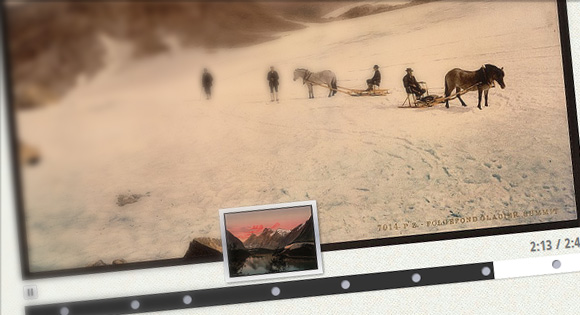
Здравствуй, дорогой хабрадруг!
Сегодня мы поделимся с вами аудио слайдшоу. Используя фреймворк jPlayer, слайдшоу будет показывать изображения и играть музыку, меняя картинки в определенном моменте песни. Ограничений в количестве изображений нет. Кроме того можно использовать тег div или любой другой макет.
Посмотреть демо | Скачать исходные файлы
Изображения взяты с Flickr. Музыка: J-Ralph.
Давай-те же приступим!
▶ HTML
<div class="audio-slideshow" data-audio="audio.mp3" data-audio-duration="161"> <div class="audio-slides"> <img src="image.jpg" data-thumbnail="thumbnail.jpg" data-slide-time="0"> <img src="image.jpg" data-thumbnail="thumbnail.jpg" data-slide-time="1"> </div> <div class="audio-control-interface"> <div class="play-pause-container"> <a href="javascript:;" class="audio-play" tabindex="1">Play</a> <a href="javascript:;" class="audio-pause" tabindex="1">Pause</a> </div> <div class="time-container"> <span class="play-time"></span> / <span class="total-time"></span> </div> <div class="timeline"> <div class="timeline-controls"></div> <div class="playhead"></div> </div> <div class="jplayer"></div> </div> </div> Внутри контейнера .audio-slideshow располагается div с классом .audio-slides. Дочерние теги могут быть любыми, какими пожелаете. В нашем случае это будут изображения. Однаком, они также могут быть и дивами с текстом. Наш тег div содержит два атрибута HTML5:
- data-thumbnail: Это иконка нашего изображения, которое будет появляться при наведении курсора на маркер.
- data-slide-time: Это время в секундах, когда должен появиться слайд.
Другие теги ответственны за другие элементы плейера: кнопки паузы и плей.
▶ CSS
/* Component style */ .audio-slideshow { width: 512px; height: 560px; position: relative; margin: 0 auto; } .audio-slideshow .audio-slides { position: relative; } .audio-slideshow .audio-slides img { display: block; position: absolute; top: 0; left: 0; } .audio-slideshow .audio-control-interface { position: absolute; bottom: 0; left: 0; width: 100%; height: 48px; } .audio-slideshow .play-pause-container, .audio-slideshow .time-container { position: absolute; bottom: 25px; height: 18px; font-weight: bold; color: #777; text-shadow: 1px 1px 1px rgba(0,0,0,0.1); } .audio-slideshow .play-pause-container a { outline: none; text-indent: -99999px; width: 16px; height: 16px; position: absolute; } .audio-slideshow .play-pause-container a.audio-play { background: transparent url(../images/play.png) no-repeat center center; } .audio-slideshow .play-pause-container a.audio-pause { background: transparent url(../images/pause.png) no-repeat center center; } .audio-slideshow .audio-control-interface .time-container { right: 3px; } .audio-slideshow .timeline { position: absolute; width: 100%; background-color: #fff; height: 20px; bottom: 0; left: 0; box-shadow: 0 1px 2px rgba(0,0,0,0.2); } .audio-slideshow .timeline .playhead { position: absolute; height: 20px; background: #333; width: 0; } .marker { width: 10px; height: 10px; border-radius: 5px; box-shadow: 1px 1px 1px rgba(0,0,0,0.4) inset; position: absolute; background: #B8BAC6; top: 5px; } .marker span { padding: 5px; position: absolute; bottom: 20px; opacity: 0; left: -50px; z-index: -1; box-shadow: 1px 1px 4px rgba(0,0,0,0.5); background: #f5f6f6; background: -moz-linear-gradient(top, #f5f6f6 0%, #dbdce2 21%, #b8bac6 49%, #dddfe3 80%, #f5f6f6 100%); background: -webkit-gradient(linear, left top, left bottom, color-stop(0%,#f5f6f6), color-stop(21%,#dbdce2), color-stop(49%,#b8bac6), color-stop(80%,#dddfe3), color-stop(100%,#f5f6f6)); background: -webkit-linear-gradient(top, #f5f6f6 0%,#dbdce2 21%,#b8bac6 49%,#dddfe3 80%,#f5f6f6 100%); background: -o-linear-gradient(top, #f5f6f6 0%,#dbdce2 21%,#b8bac6 49%,#dddfe3 80%,#f5f6f6 100%); background: -ms-linear-gradient(top, #f5f6f6 0%,#dbdce2 21%,#b8bac6 49%,#dddfe3 80%,#f5f6f6 100%); background: linear-gradient(top, #f5f6f6 0%,#dbdce2 21%,#b8bac6 49%,#dddfe3 80%,#f5f6f6 100%); filter: progid:DXImageTransform.Microsoft.gradient( startColorstr='#f5f6f6', endColorstr='#f5f6f6',GradientType=0 ); -webkit-transition: all 0.3s ease-in-out; -moz-transition: all 0.3s ease-in-out; -o-transition: all 0.3s ease-in-out; -ms-transition: all 0.3s ease-in-out; transition: all 0.3s ease-in-out; } .marker span img { display: block; } .marker:hover span { opacity: 1; z-index: 100; } Как видно из CSS, почти все можно отредактировать. Бегунок с временем может быть больше или меньше, выше или ниже изображений, и т.д.
▶ Javascript
<script src="//ajax.googleapis.com/ajax/libs/jquery/1.7.1/jquery.min.js"></script> <script>window.jQuery || document.write('>script src="/lib/js/jquery-1.7.1.min.js"><\/script>')</script> <script src="jplayer/jquery.jplayer.js"></script> <script src="js/jquery.audioslideshow.js"></script> <script> $(document).ready(function() { $('.audio-slideshow').audioSlideshow(); }); </script> Для настройки слайдшоу вам понадобятся три скрипта:
Как только скрипты прикреплены к странице, нужно вызвать audioSlideshow на любом теге.
Если вы меняли название селекторов, не забудьте указать их в плагине:
<script> $(document).ready(function() { $('.audio-slideshow').audioSlideshow( { jPlayerPath: "/lib/swf", suppliedFileType: "mp3", playSelector: ".audio-play", pauseSelector: ".audio-pause", currentTimeSelector: ".play-time", durationSelector: ".total-time", playheadSelector: ".playhead", timelineSelector: ".timeline" } ); }); </script> Посмотреть демо | Скачать исходные файлы
P.S. Все замечания по поводу перевода с удовольствием приму в личку. Спасибо!
ссылка на оригинал статьи http://habrahabr.ru/post/180657/
Добавить комментарий