
Что если я расскажу вам как без особых усилий поднять свой собственный jabber-сервер со всеми новомодными фичами, такими как: архивация, синхронизация сообщений между клтентами, уведомления о прочтении, публичные чаты и многое другое…
Так же поделюсь с вами замечательным Jabber-клиентом который не менее интересен, он поддерживает аудио и видео звонки, имеет неплохой интерфейс и работает прямо из браузера.
То и другое вы получите абсолютно бесплатно, так-как и сервер и клиент лицензируются по свободнлй лицензии.
Речь пойдет об Metronome IM и Jappix.
Стоит принять во внимание то, что оба проекта могут работать независимо друг от друга, к Metronome IM, все так же можно подключаться любым Jabber-клиентом, а Jappix может использоваться для любого другого Jabber-сервера, поддерживающего BOSH.

Metronome IM
Author: Marco Cirillo
Site: lightwitch.org/metronome
License: MIT
Written in: Lua
И так, начнем мы пожалуй с серверной части.
Metronome IM — это Jabber-сервер, форк небезизвестного Prosody IM, о котором уже не раз писали на Хабре. В отличии от Prosody, Metronome создан в первую очередь для поддержки различных социальных фишек, таких как pubsub, user activity, mood, и других, но не они в первую очередь нас интересуют.
Полный список всех XEP, которые работают из коробки, вы можете найти на этой странице. Согласитесь, список довольно внушающий!
Среди всех XEP есть: и Message archive (архивация сообщений), и Carbons (синхронизация сообщений между клиентами), и Offline Messages (офлайновые сообщения)… Для тех кто не знает, во многих других jabber-серверах, по умолчанию, все это работает весьма посредственно и требует доработки напильником.
В Metronome IM же все XEP работают сразу корректно и на большинстве Jabber-клиентов.
Из практики могу сказать, что у вас скорее всего больше не будет таких неприятных глюков, когда ваше сообщение куда-то потеряется, продублируется, или будет отображаться в одном клиенте, а другой его даже не увидит.
Плюс ко всему, сервер написан на lua, имеет много модулей и довольно простой для понимания конфиг.
Так же к нему подойдет большинство модулей от Prosody IM после небольшого допила, но этого, я уверен, вам, в большинстве случаев, даже не понадобится.
Установка
По умолчанмю Metronome IM не поставляется в виде готовых пакетов, по этому будем собирать его из исходников, вы так же можете установить его используя Docker
Для начала установим зависимости:
Ubuntu / Debian:
apt-get update apt-get -y install libssl-dev libidn11-dev build-essentials lua5.1 liblua5.1-dev liblua5.1-bitop-dev liblua5.1-expat-dev liblua5.1-event-dev lua5.1-posix-dev lua5.1-sec-dev lua5.1-socket-dev lua5.1-filesystem-dev CentOS:
yum -y install epel-release yum -y install gcc lua-devel openssl-devel libidn-devel lua-expat lua-socket lua-filesystem lua-sec lua-dbi lua-event # Install lua-zlib module curl https://codeload.github.com/brimworks/lua-zlib/tar.gz/v0.4 | tar xzv -C /usr/src/ cd /usr/src/lua-zlib-0.4/ make linux make install # Install lua-bitop module curl http://bitop.luajit.org/download/LuaBitOp-1.0.2.tar.gz | tar xzv -C /usr/src/ cd /usr/src/LuaBitOp-1.0.2 make make install Скачаем исходники, соберем и установим их:
useradd -r -s /sbin/nologin -d /var/lib/metronome metronome git clone https://github.com/maranda/metronome.git /usr/src/metronome curl -L https://github.com/maranda/metronome/archive/v3.7.tar.gz | sudo tar xz -C /usr/src/ cd /usr/src/metronome* ./configure --prefix=/usr --sysconfdir=/etc/prosody --datadir=/var/lib/prosody --require-config --ostype=debian # --ostype=linux make && make install mkdir /var/log/metronome /var/run/metronome chown metronome: /var/lib/metronome /var/log/metronome /var/run/metronome Создадим unit для systemd: /etc/systemd/system/metronome.service
[Unit] Description=XMPP (Jabber) Server After=network.target [Service] Type=forking PIDFile=/run/metronome/metronome.pid ExecStart=/usr/bin/metronomectl start ExecStop=/usr/bin/metronomectl stop [Install] WantedBy=multi-user.target Установка завершена
Настройка
Скачаем конфиг metronome.cfg.lua любезно предоставленный нам сервисом jappix.com
После небольших правок у меня получился примерно такой конфиг:
-- Prosody XMPP Server Configuration -- -- Information on configuring Prosody can be found on our -- website at http://metronome.im/doc/configure -- -- Tip: You can check that the syntax of this file is correct -- when you have finished by running: metronomectl check config -- If there are any errors, it will let you know what and where -- they are, otherwise it will keep quiet. -- -- Good luck, and happy Jabbering! ---------- Server-wide settings ---------- -- Settings in this section apply to the whole server and are the default settings -- for any virtual hosts -- This is a (by default, empty) list of accounts that are admins -- for the server. Note that you must create the accounts separately -- (see http://metronome.im/doc/creating_accounts for info) -- Example: admins = { "user1@example.com", "user2@example.net" } admins = { } -- Required for init scripts and metronomectl pidfile = "/var/run/metronome/metronome.pid" -- ulimit metronome_max_files_soft = 200000 metronome_max_files_hard = 200000 -- HTTP server http_ports = { 5280 } http_interfaces = { "0.0.0.0", "::" } https_ports = { 5281 } https_interfaces = { "0.0.0.0", "::" } -- Enable IPv6 use_ipv6 = true -- This is the list of modules Prosody will load on startup. -- It looks for mod_modulename.lua in the plugins folder, so make sure that exists too. -- Documentation on modules can be found at: http://metronome.im/doc/modules modules_enabled = { -- Generally required --"roster"; -- Allow users to have a roster. Recommended ;) "saslauth"; -- Authentication for clients and servers. Recommended if you want to log in. "tls"; -- Add support for secure TLS on c2s/s2s connections "dialback"; -- s2s dialback support "disco"; -- Service discovery "extdisco"; -- External Service Discovery -- Not essential, but recommended --"private"; -- Private XML storage (for room bookmarks, etc.) --"vcard"; -- Allow users to set vCards -- These are commented by default as they have a performance impact "compression"; -- Stream compression (requires the lua-zlib package installed) -- Nice to have "version"; -- Replies to server version requests "uptime"; -- Report how long server has been running "time"; -- Let others know the time here on this server "ping"; -- Replies to XMPP pings with pongs --"pep"; -- Enables users to publish their mood, activity, playing music and more --"register"; -- Allow users to register on this server using a client and change passwords -- Admin interfaces "admin_adhoc"; -- Allows administration via an XMPP client that supports ad-hoc commands --"admin_telnet"; -- Opens telnet console interface on localhost port 5582 -- HTTP modules "bosh"; -- Enable BOSH clients, aka "Jabber over HTTP" "websocket"; -- Enable WebSocket clients --"http_files"; -- Serve static files from a directory over HTTP -- Other specific functionality "posix"; -- POSIX functionality, sends server to background, enables syslog, etc. "bidi"; -- Bidirectional Streams for S2S connections "stream_management"; -- Stream Management support --"groups"; -- Shared roster support --"announce"; -- Send announcement to all online users --"welcome"; -- Welcome users who register accounts --"watchregistrations"; -- Alert admins of registrations --"motd"; -- Send a message to users when they log in "legacyauth"; -- Legacy authentication. Only used by some old clients and bots. "log_auth"; } -- These modules are auto-loaded, but should you want -- to disable them then uncomment them here: modules_disabled = { -- "offline"; -- Store offline messages -- "c2s"; -- Handle client connections -- "s2s"; -- Handle server-to-server connections } -- Discovery items disco_items = { { "muc.example.org" }, { "proxy.example.org" }, { "pubsub.example.org" }, { "vjud.example.org" } }; -- External Service Discovery (mod_extdisco) external_services = { ["stun.example.org"] = { [1] = { port = "3478", transport = "udp", type = "stun" }, [2] = { port = "3478", transport = "tcp", type = "stun" } } }; -- Bidirectional Streams configuration (mod_bidi) bidi_exclusion_list = { "jabber.org" } -- BOSH configuration (mod_bosh) bosh_max_inactivity = 30 consider_bosh_secure = true cross_domain_bosh = true -- WebSocket configuration (mod_websockets) consider_websockets_secure = true cross_domain_websockets = true -- Disable account creation by default, for security allow_registration = false -- Ignore priority settings ignore_presence_priority = true -- These are the SSL/TLS-related settings. If you don't want -- to use SSL/TLS, you may comment or remove this ssl = { key = "/etc/metronome/certs/localhost.key"; certificate = "/etc/metronome/certs/localhost.cert"; options = { "no_sslv2", "no_sslv3", "no_ticket", "no_compression", "cipher_server_preference" }; } -- Force clients to use encrypted connections? This option will -- prevent clients from authenticating unless they are using encryption. c2s_require_encryption = true -- Force servers to use encrypted connections? This option will -- prevent servers from connecting unless they are using encryption. s2s_require_encryption = true -- Allow servers to use an unauthenticated encryption channel s2s_allow_encryption = true -- Don't require encryption for listed servers s2s_encryption_exceptions = { "cisco.com", "gmail.com" } -- Logging configuration -- For advanced logging see http://metronome.im/doc/logging log = { info = "/var/log/metronome/metronome.log"; -- Change 'info' to 'debug' for verbose logging error = "/var/log/metronome/metronome.err"; -- "*syslog"; -- Uncomment this for logging to syslog -- "*console"; -- Log to the console, useful for debugging with daemonize=false } activity_log_dir = "/var/log/metronome/activity_log" -- For the "sql" backend, you can uncomment *one* of the below to configure: sql = { driver = "SQLite3", database = "metronome.sqlite" } -- Default. 'database' is the filename. --sql = { driver = "MySQL", database = "metronome", username = "metronome", password = "password", host = "localhost" } --sql = { driver = "PostgreSQL", database = "metronome", username = "metronome", password = "secret", host = "localhost" } ----------- Virtual hosts ----------- -- You need to add a VirtualHost entry for each domain you wish Prosody to serve. -- Settings under each VirtualHost entry apply *only* to that host. VirtualHost "example.org" enabled = true default_storage = "sql" modules_enabled = { -- Generally required "roster"; -- Allow users to have a roster. Recommended ;) -- Not essential, but recommended "private"; -- Private XML storage (for room bookmarks, etc.) "vcard"; -- Allow users to set vCards -- These are commented by default as they have a performance impact "mam"; -- Message Archive Management "privacy"; -- Support privacy lists -- Nice to have "lastactivity"; -- Logs the user last activity timestamp "pep"; -- Enables users to publish their mood, activity, playing music and more "message_carbons"; -- Allow clients to keep in sync with messages send on other resources --"register"; -- Allow users to register on this server using a client and change passwords --"register_redirect"; -- Redirects users registering to the registration form "public_service"; -- Provides some information about the XMPP server --"log_activity"; -- Activity log, module from https://github.com/jappix/jappix-xmppd-modules "groups"; -- Shared groups -- Admin interfaces --"admin_adhoc"; -- Allows administration via an XMPP client that supports ad-hoc commands } groups_file = "/etc/metronome/groups.txt" resources_limit = 10 no_registration_whitelist = true registration_url = "https://example.org/" registration_text = "Please register your account on Jappix itself (open example.org in your Web browser). Then you'll be able to use it anywhere you want." public_service_vcard = { name = "Jappix XMPP service", url = "https://example.org/", foundation_year = "2010", country = "RU", email = "admin@example.org", admin_jid = "admin@example.org", geo = "48.87,2.33", ca = { name = "StartSSL", url = "https://www.startssl.com/" }, oob_registration_uri = "https://example.org/" } VirtualHost "anonymous.example.org" enabled = true authentication = "anonymous" allow_anonymous_multiresourcing = true allow_anonymous_s2s = true anonymous_jid_gentoken = "Jappix Anonymous User" anonymous_randomize_for_trusted_addresses = { "127.0.0.1", "::1" } ------ Components ------ -- You can specify components to add hosts that provide special services, -- like multi-user conferences, and transports. ---Set up a MUC (multi-user chat) room server on muc.example.org: Component "muc.example.org" "muc" name = "Jappix Chatrooms" modules_enabled = { "muc_limits"; "muc_log"; "muc_log_http"; "pastebin"; } muc_event_rate = 0.5 muc_burst_factor = 10 muc_log_http_config = { url_base = "logs"; theme = "metronome"; } pastebin_url = "https://muc.example.org/paste/" pastebin_path = "/paste/" pastebin_expire_after = 0 pastebin_trigger = "!paste" ---Set up a PubSub server Component "pubsub.example.org" "pubsub" name = "Jappix Publish/Subscribe" --unrestricted_node_creation = true -- Anyone can create a PubSub node (from any server) ---Set up a VJUD service Component "vjud.example.org" "vjud" ud_disco_name = "Jappix User Directory" synchronize_to_host_vcards = "example.org" ---Set up a BOSH service ( https://bind.example.org:5281/http-bind ) Component "bind.example.org" "http" modules_enabled = { "bosh" } ---Set up a WebSocket service Component "websocket.example.org" "http" modules_enabled = { "websocket" } ---Set up a BOSH + WebSocket service Component "me.example.org" "http" modules_enabled = { "bosh", "websocket" } ---Set up a statistics service Component "stats.example.org" "http" modules_enabled = { "server_status" } server_status_basepath = "/xmppd/" server_status_show_hosts = { "example.org", "anonymous.example.org" } server_status_show_comps = { "muc.example.org", "proxy.example.org", "pubsub.example.org", "vjud.example.org" } -- Set up a SOCKS5 bytestream proxy for server-proxied file transfers: Component "proxy.example.org" "proxy65" proxy65_acl = { "example.org", "anonymous.example.org" } Конфиг очень хорошо прокоментирован и я не вижу особого смысла оставлять дополнительные коментарии с моей стороны.
Скажу лишь то, что если вы планируете установку jappix или любого другого web-клиента, то вам будет необходим компонент BOSH. Именно через него ваш web-клиент будет общаться с вашим сервером.
Узнать больше о конфигурировании сервера и посмотреть примеры вы можете на официальном сайте проекта.
Не забываем прописать необходимые DNS-записи на нашем DNS-сервере:
xmpp IN A 1.2.3.4 muc CNAME xmpp pubsub CNAME xmpp vjud CNAME xmpp bind CNAME xmpp websocket CNAME xmpp me CNAME xmpp stats CNAME xmpp proxy CNAME xmpp anonymous CNAME xmpp _xmpp-client._tcp.example.org. IN SRV 0 5 5222 xmpp.example.org. _xmpp-server._tcp.example.org. IN SRV 0 5 5269 xmpp.example.org. Запускаем сервис:
systemctl enable metronome systemctl start metronome Проверяем логи.
Если все ок, создаем пользователя:
prosodyctl adduser me@example.com И пробуем подключиться.
Наш сервер готов!

Jappix
Author: Valérian Saliou, Julien Barrier
Site: jappix.org
License: AGPL
Written in: JavaScript
Demo: jappix.com
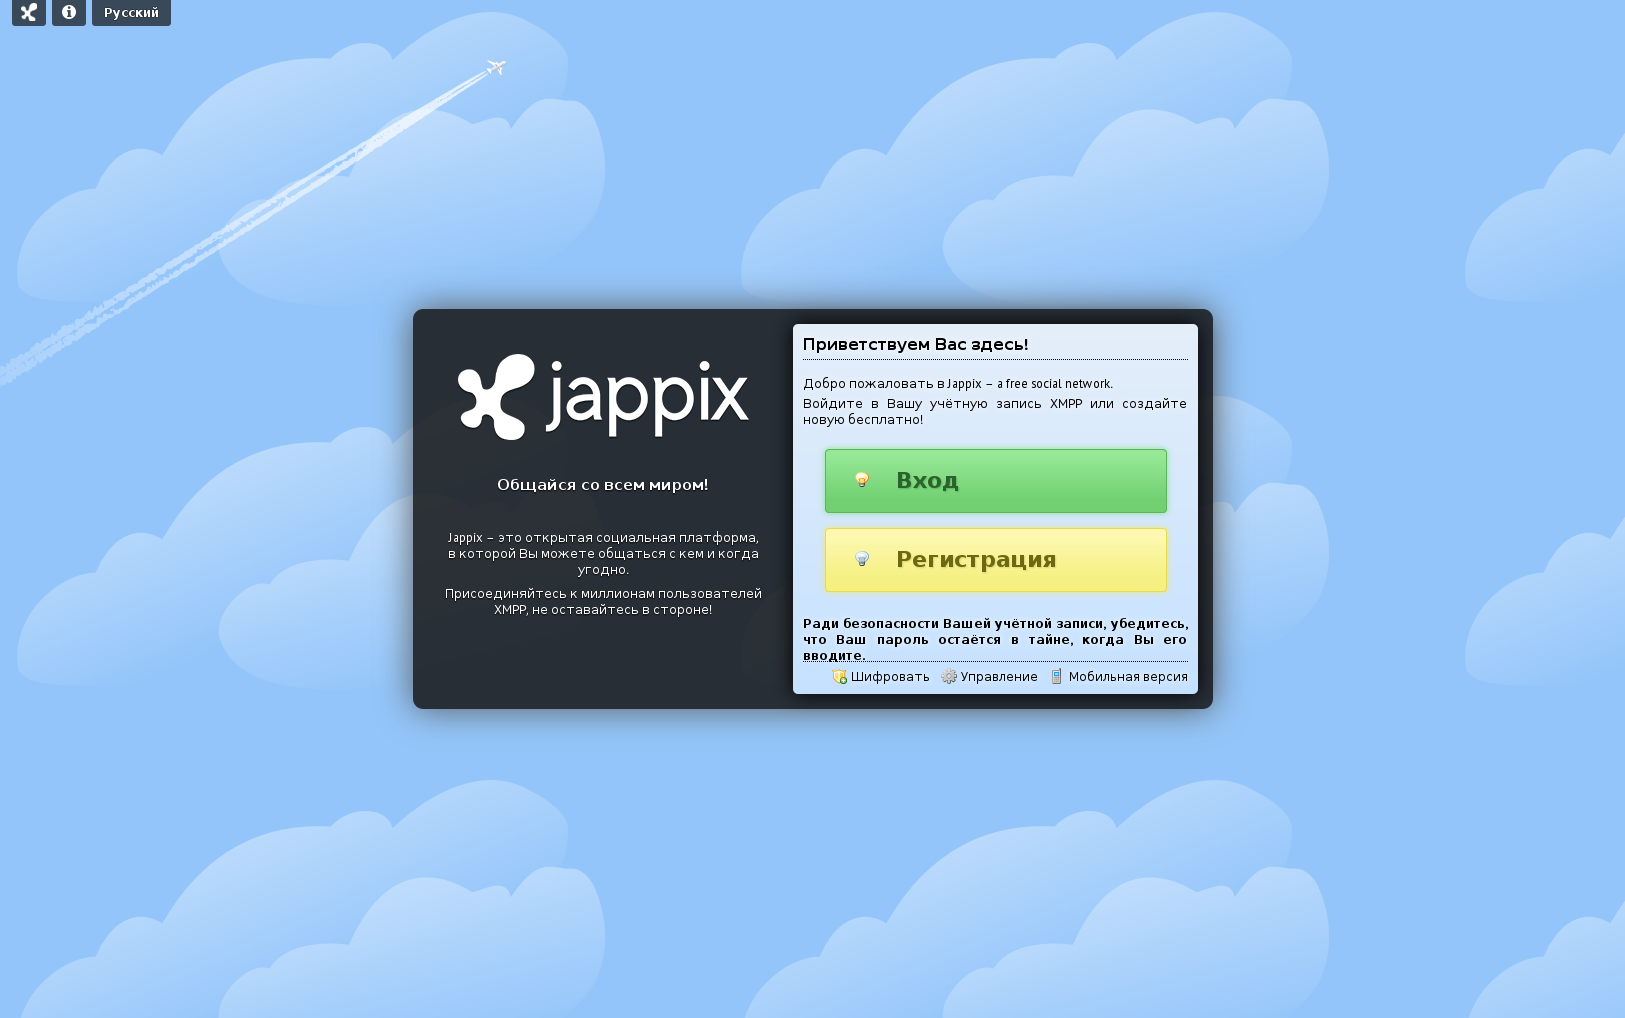
Как я уже говорил Jappix — это Jabber-клиент, который имеет весьма неплохой интерфейс, поддерживает аудио и видео звонки, так же поддерживает большинство популярных XEP и работает прямо из окна браузера.
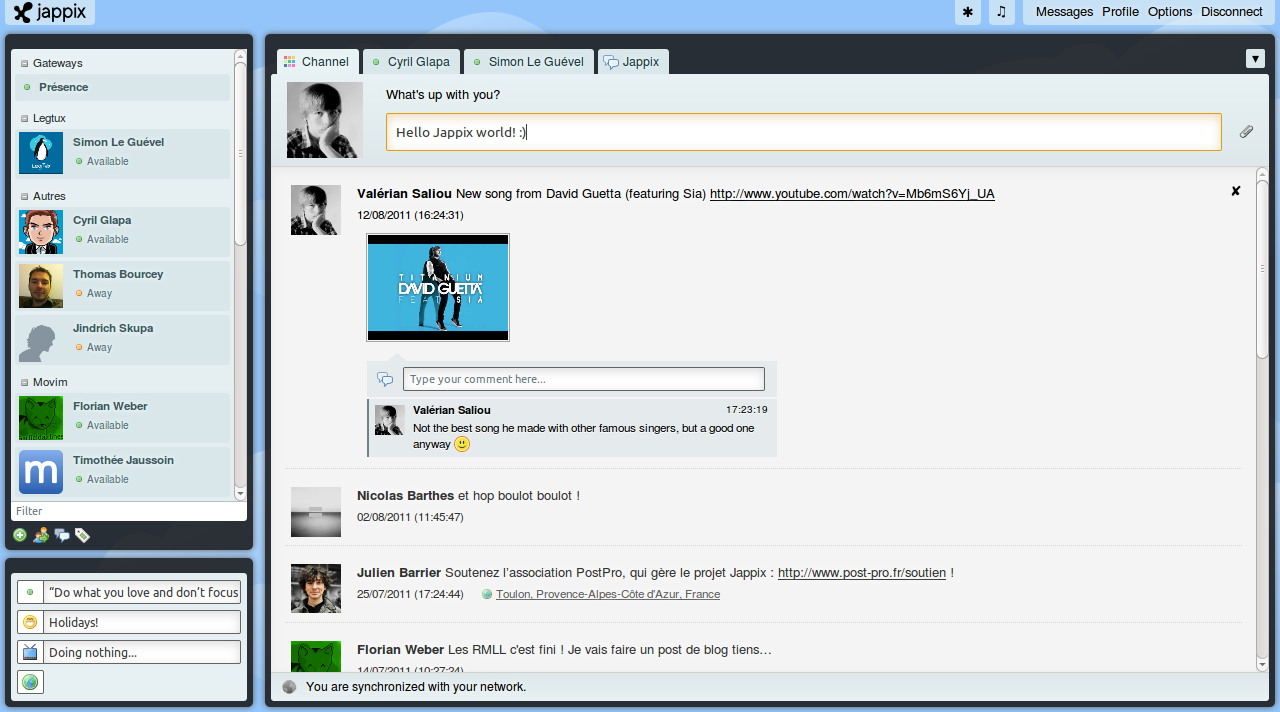
Cам клиент выглядит примерно так:
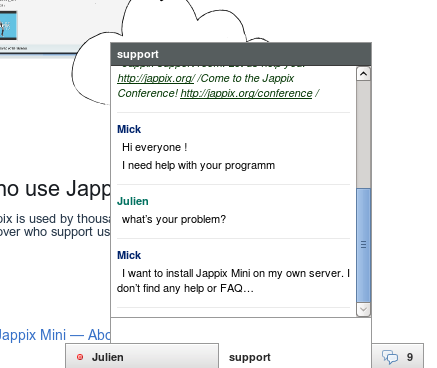
Так же он имеет уменьшенную версию, для встраивания на сайт:
Установка
Пришло время для установки нашего клиента.
Установка не являет ссобой что-то нетривиальное. Все действия сводятся к тому, что бы скопировать файлы проекта в директорию вашего веб-сервера. Но вы все так-же можете установить Jappix используя Docker.
И так приступим, установим зависимости:
Debian/Ubuntu:
apt-get install php5-gd php5-curl CentOS:
yum install php-mbstring Теперь скачаем jappix-1.1.6-primo.tar.bz2 и распакуем его в /var/www
curl -L https://download.jappix.org/1.1.6/jappix-1.1.6-primo.tar.bz2 | tar xvj -C /var/www Напишем конфиг для нашего веб-сервера, например для nginx он будет выглядеть примерно так:
server { listen 80; server_name jappix.example.org; return 301 https://jappix.example.org$request_uri; } server { listen 443 ssl; server_name jappix.example.org; root /var/www/jappix; index index.html index.php; access_log /var/log/nginx/jappix-access.log; error_log /var/log/nginx/jappix-error.log; # Configuration SSL # Support du HSTS (HTTP Strict Transport Security) add_header Strict-Transport-Security "max-age=315360000; includeSubdomains"; # Configuration SSL ssl_certificate /etc/nginx/certificates/common-ssl.cert; ssl_certificate_key /etc/nginx/certificates/common-ssl.key; ssl_protocols TLSv1 TLSv1.1 TLSv1.2; ssl_prefer_server_ciphers on; ssl_ciphers "EECDH+ECDSA+AESGCM EECDH+aRSA+AESGCM EECDH+ECDSA+SHA384 EECDH+ECDSA+SHA256 EECDH+aRSA+SHA384 EECDH+aRSA+SHA256 EECDH EDH+aRSA !RC4 !aNULL !eNULL !LOW !3DES !MD5 !EXP !PSK !SRP !DSS"; location / { try_files $uri $uri/ /index.php?$args; } location ~ \.php$ { try_files $uri =404; fastcgi_index index.php; fastcgi_pass php5-fpm-sock; fastcgi_param SCRIPT_FILENAME $document_root$fastcgi_script_name; include /etc/nginx/fastcgi_params; fastcgi_param PHP_VALUE "upload_max_filesize = 25M \n post_max_size = 25M \n max_execution_time = 600"; } location ~ /(app|i18n|log|test|tmp|tools)/ { deny all; } } Перезапускаем веб-сервер.
Более подробную информацию об установке вы можете найти в официальной wiki проекта.
Настройка
Jappix имеет графический установщик. Заходим по ссылке:
https://jappix.example.org/?m=install Создаем администратора, отвечаем на другие вопросы, вводим адреса до нашего сервера.
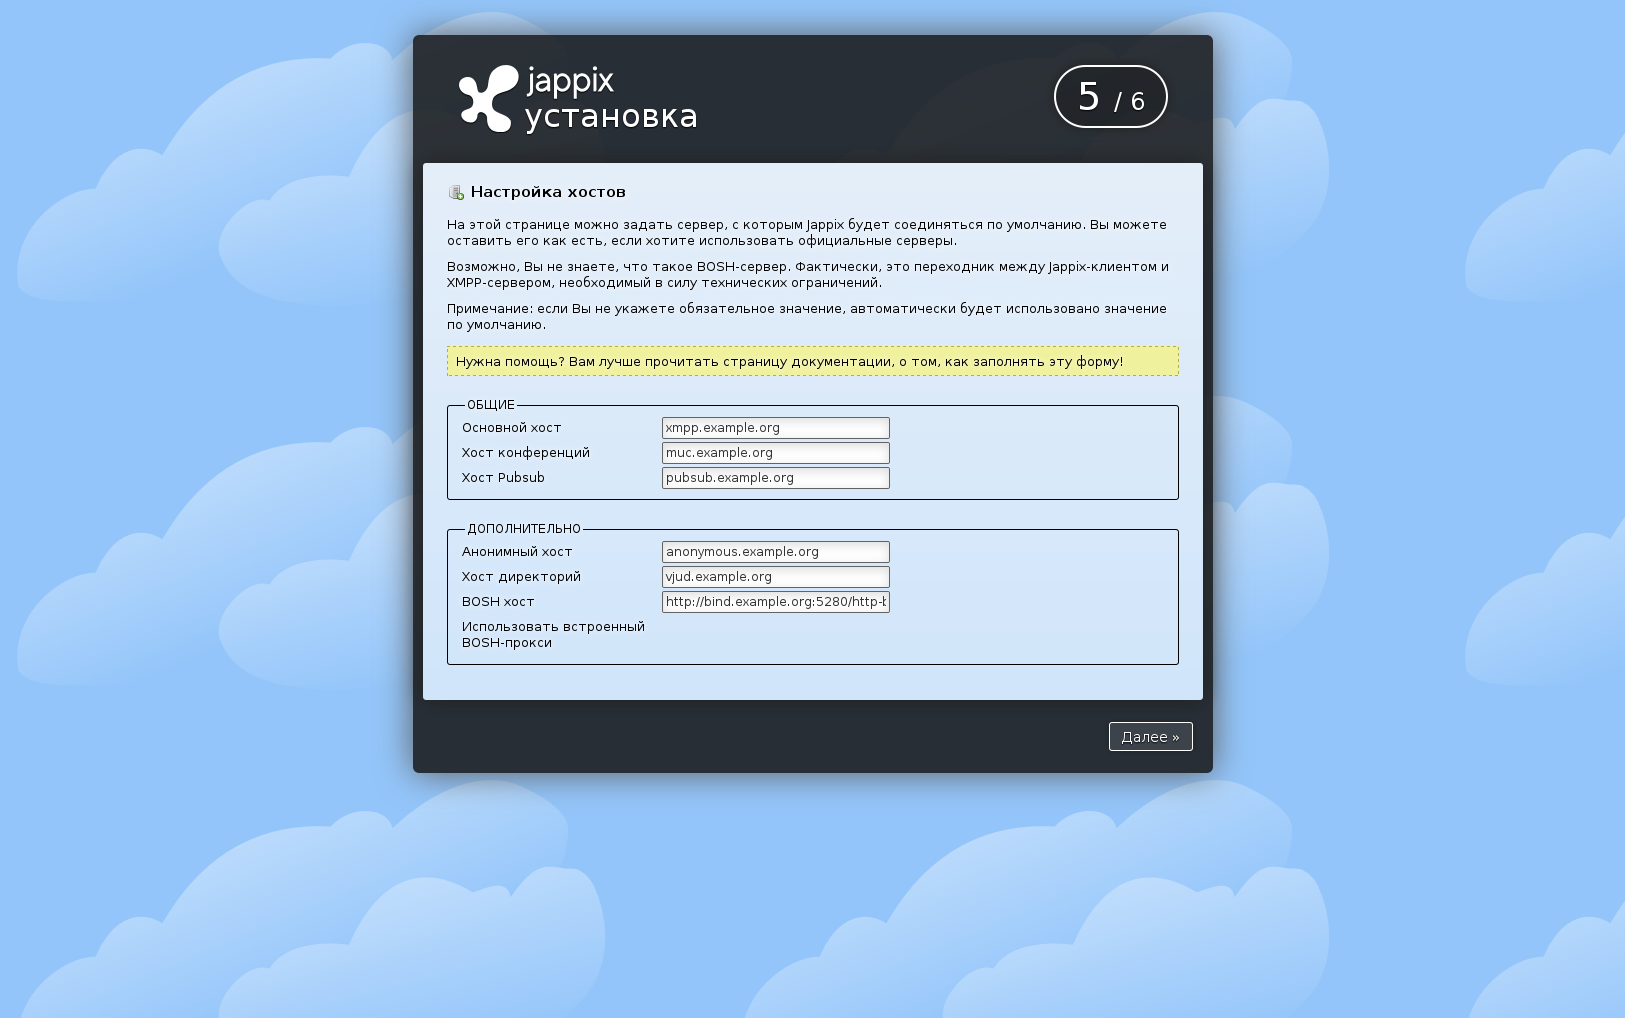
Вот так выглядит страгичка настроек сервера:
Когда установка будет завершена, вас перекинет на окно логина.
В дальнейшем вы сможете попасть в админку по следующей ссылке:
https://jappix.example.org/?m=manager Let’s Encrypt
Пара слов о сертификатах.
Оставлять сервер с самоподписанным сертификатами не есть хорошо, нужно установить хотя бы бесплатный.
Мы сделали доволно много субдоменов, так что одного бесплатного сертификата нам для всех не хватит, а получать для каждого отдельный будет довольно накладно. Выход есть — это Let’s Encrypt.
На хабре MalcolmReynolds уже описывал процедуру получения сертификатов у Let’s Encrypt.
Так же есть пара классных статей на DigitalOcean — nginx, apache
Но, если вы используете Docker, то предлагаю вам попробовать мой образ: kvaps/letsencrypt-webroot
Благодарю за внимание!
ссылка на оригинал статьи https://habrahabr.ru/post/270207/
Добавить комментарий