ISPConfig — бесплатная панель управления хостингом с открытым исходным кодом c возможностью управлять несколькими серверами из одной панели управления. Это один из лучших вариантов для веб-студий, хостинг-компаний, а так же для всех, кто ищет бесплатную панель управления хостингом с широким функционалом.
В сети есть инструкции по установке на OpenSuSe, Fedora, CentOS, Debian и Ubuntu разных версий, с выходом новой ОС из поддерживаемых инструкции обновляют, но инструкция под ubuntu 20.04 с nginx почему-то выпала из числа обновленных. Самое время это исправить.
Убедимся, что наша ОС сконфигурирована
Убедимся, что на нашем сервере установлены последние версии всех пакетов, установлен ssh клиент и vim (или любой другой текстовый редактор, в котором вам будет удобно работать), настроен статичный ip, hosts, hostname и локали.
Для установки обновлений, ssh и текстового редактора выполним команды:
sudo -s
apt update && apt upgrade -y && apt autoremove -y && apt install -y ssh openssh-server nano vim-nox
Настроим статичный ip, для этого откроем файл конфигурации и укажем необходимые настройки:
vi /etc/netplan/00-installer-config.yaml
/etc/netplan/00-installer-config.yaml
network:
version: 2
renderer: networkd
ethernets:
eth0:
dhcp4: no
addresses: [185.104.112.249/24]
gateway4: 185.104.112.1
nameservers:
addresses: [8.8.8.8, 8.8.4.4]
Проверим корректность конфигурации командой
netplan try
В случае если все хорошо и конфигурация верна, появится надпись с предложением применить конфигурацию, для применения необходимо нажать клавишу ENTER, если в течении 120 секунд мы не согласимся — будет использована предыдущая конфигурация:
netplan try
root@host:~# netplan try
Warning: Stopping systemd-networkd.service, but it can still be activated by:
systemd-networkd.socket
Do you want to keep these settings?
Press ENTER before the timeout to accept the new configuration
Changes will revert in 116 seconds
Также применить конфигурацию можно с помощью команды
netplan apply
Откроем файл hosts командой
vi /etc/hosts
и убедимся в наличии строки указывающей на наш сервер, как по имени хоста, так по имени хоста и домену (ispnginx — имя хоста, сat-a.ru — домена):
/etc/hosts
127.0.0.1 localhost.localdomain localhost
185.104.112.249 ispnginx.cat-a.ru ispnginx
::1 localhost6.localdomain6 localhost6
# The following lines are desirable for IPv6 capable hosts
::1 localhost ip6-localhost ip6-loopback
fe00::0 ip6-localnet
ff02::1 ip6-allnodes
ff02::2 ip6-allrouters
ff02::3 ip6-allhosts
Установим хостнейм, выполнив команды:
echo ispnginx > /etc/hostname && hostname ispnginx
или
hostnamectl set-hostname ispnginx
Проверим, изменился ли hostname командами:
hostname
hostname -f
Вывод должен выглядеть примерно так
root@host:~# hostname
ispnginx
root@host:~# hostname -f
ispnginx.cat-a.ru
Настроим локали, выполнив:
dpkg-reconfigure locales
Выбираем для установки en_US.UTF-8 и ru_RU.UTF-8, после чего перезагрузим сервер — он предварительно подготовлен к установке Ispconfig
Изменим оболочку по умолчанию
В настоящий момент /bin/sh — симлинк /bin/dash, но нам нужно /bin/bash, выполним:
dpkg-reconfigure dash
В открывшемся окне выбираем «No»

Выключим и удалим apparmor
service apparmor stop && update-rc.d -f apparmor remove && apt-get remove apparmor apparmor-utils
Установим ntp
apt install -y ntp ntpdate
Установим Postfix, Dovecot, MySQL, phpMyAdmin, rkhunter, Binutils
Установим Postfix, Dovecot, MySQL, rkhunter и binutils с помошью команды:
apt install -y postfix postfix-mysql postfix-doc mysql-client mysql-server openssl getmail4 rkhunter binutils dovecot-imapd dovecot-pop3d dovecot-mysql dovecot-sieve dovecot-lmtpd sudo patch
Когда установщик попросит указать какую почтовый конфигурацию выбрать указываем Internet Site, в качестве System mail name указываем hostname
General type of mail configuration: <— Internet Site
System mail name: <— server1.example.com
Откроем TLS/SSL и submission порты в Postfix, для этого откроем файл /etc/postfix/master.cf
vi /etc/postfix/master.cf
и раскомментируем секции submission, smtps, а также по первые 3 строчки в каждой секции и добавим к обеим секциям строку (не забываем 2 пробела в начале строки):
-o smtpd_client_restrictions=permit_sasl_authenticated,reject
/etc/postfix/master.cf должен выглядеть так:
smtp inet n — y — — smtpd
#smtp inet n — y — 1 postscreen
#smtpd pass — — y — — smtpd
#dnsblog unix — — y — 0 dnsblog
#tlsproxy unix — — y — 0 tlsproxy
submission inet n — y — — smtpd
-o syslog_name=postfix/submission
-o smtpd_tls_security_level=encrypt
-o smtpd_sasl_auth_enable=yes
-o smtpd_client_restrictions=permit_sasl_authenticated,reject
# -o smtpd_tls_auth_only=yes
# -o smtpd_reject_unlisted_recipient=no
# -o smtpd_client_restrictions=$mua_client_restrictions
# -o smtpd_helo_restrictions=$mua_helo_restrictions
# -o smtpd_sender_restrictions=$mua_sender_restrictions
# -o smtpd_recipient_restrictions=
# -o smtpd_relay_restrictions=permit_sasl_authenticated,reject
# -o milter_macro_daemon_name=ORIGINATING
smtps inet n — y — — smtpd
-o syslog_name=postfix/smtps
-o smtpd_tls_wrappermode=yes
-o smtpd_sasl_auth_enable=yes
-o smtpd_client_restrictions=permit_sasl_authenticated,reject
# -o smtpd_reject_unlisted_recipient=no
# -o smtpd_client_restrictions=$mua_client_restrictions
# -o smtpd_helo_restrictions=$mua_helo_restrictions
# -o smtpd_sender_restrictions=$mua_sender_restrictions
# -o smtpd_recipient_restrictions=
# -o smtpd_relay_restrictions=permit_sasl_authenticated,reject
# -o milter_macro_daemon_name=ORIGINATING
Выполним перезагрузку postfix
service postfix restart
Чтобы базы данных были доступны удалено отредактируем файл /etc/mysql/mysql.conf.d/mysqld.cnf и закомментируем стоки:
bind-address = 127.0.0.1
mysqlx-bind-address = 127.0.0.1
Ниже добавим строку:
mysqlx=OFF
vi /etc/mysql/mysql.conf.d/mysqld.cnf
/etc/mysql/mysql.conf.d/mysqld.cnf
[mysqld]
#
# * Basic Settings
#
user = mysql
# pid-file = /var/run/mysqld/mysqld.pid
# socket = /var/run/mysqld/mysqld.sock
# port = 3306
# datadir = /var/lib/mysql
# If MySQL is running as a replication slave, this should be
# changed. Ref https://dev.mysql.com/doc/refman/8.0/en/server-system-variables.html#sysvar_tmpdir
# tmpdir = /tmp
#
# Instead of skip-networking the default is now to listen only on
# localhost which is more compatible and is not less secure.
#bind-address = 127.0.0.1
#mysqlx-bind-address = 127.0.0.1
mysqlx=OFF
Перезапустим mysql и проверим, что сетевой доступ к mysql включен командой:
service mysql restart && netstat -tap | grep mysql
Вывод должен быть аналогичен данному:
root@ispnginx:~# netstat -tap | grep mysql
tcp6 0 0 [::]:mysql [::]:* LISTEN 18513/mysqld
root@ispnginx:~#
Установим Amavisd-new, SpamAssassin, and Clamav
Выполним установку командой:
apt install -y amavisd-new spamassassin clamav clamav-daemon unzip bzip2 arj nomarch lzop cabextract apt-listchanges libnet-ldap-perl libauthen-sasl-perl clamav-docs daemon libio-string-perl libio-socket-ssl-perl libnet-ident-perl zip libnet-dns-perl postgrey
т.к. amavisd, загружает фильтры SpamAssassin, мы можем остановить SpamAssassin для экономии памяти
service spamassassin stop
update-rc.d -f spamassassin remove
Запустим ClamAV
freshclam
service clamav-daemon start
Ошибку при первом запуске игнорируем
root@ispnginx:~# service spamassassin stop
root@ispnginx:~# update-rc.d -f spamassassin remove
root@ispnginx:~# freshclam
WARNING: Ignoring deprecated option SafeBrowsing at /etc/clamav/freshclam.conf:22
ERROR: /var/log/clamav/freshclam.log is locked by another process
ERROR: Problem with internal logger (UpdateLogFile = /var/log/clamav/freshclam.log).
ERROR: initialize: libfreshclam init failed.
ERROR: Initialization error!
root@ispnginx:~# service clamav-daemon start
root@ispnginx:~#
Установим Nginx, PHP 7.4 (PHP-FPM), and Fcgiwrap
Установим nginx
apt-get install nginx
Обращаться к интерпретатору мы будем через PHP-FPM (FastCGI Process Manager), установим его:
apt-get -y install php7.4-fpm
Поищем дополнительные модули php:
apt-cache search php7.4
Выберем необходимые и установим:
apt install -y php7.4-common php7.4 php7.4-gd php7.4-mysql php7.4-imap php7.4-cli php7.4-cgi php7.4-curl php7.4-pspell php7.4-intl php7.4-sqlite3 php7.4-tidy php7.4-xml php7.4-xmlrpc php7.4-zip php7.4-xsl php7.4-mbstring php7.4-soap php-pear mcrypt imagemagick libruby memcached php-memcache php-imagick php-soap php-apcu
Откроем файл
vi /etc/php/7.4/fpm/php.ini
И установим cgi.fix_pathinfo=0, your timezone, short_open_tag= On
/etc/php/7.4/fpm/php.ini
[…]
cgi.fix_pathinfo=0
[…]
date.timezone=»Europe/Moscow»
[…]
short_open_tag = On
[…]
Перезагрузим PHP-FPM:
service php7.4-fpm reload
Чтобы получить поддержку CGI в nginx, установим Fcgiwrap:
apt-get -y install fcgiwrap
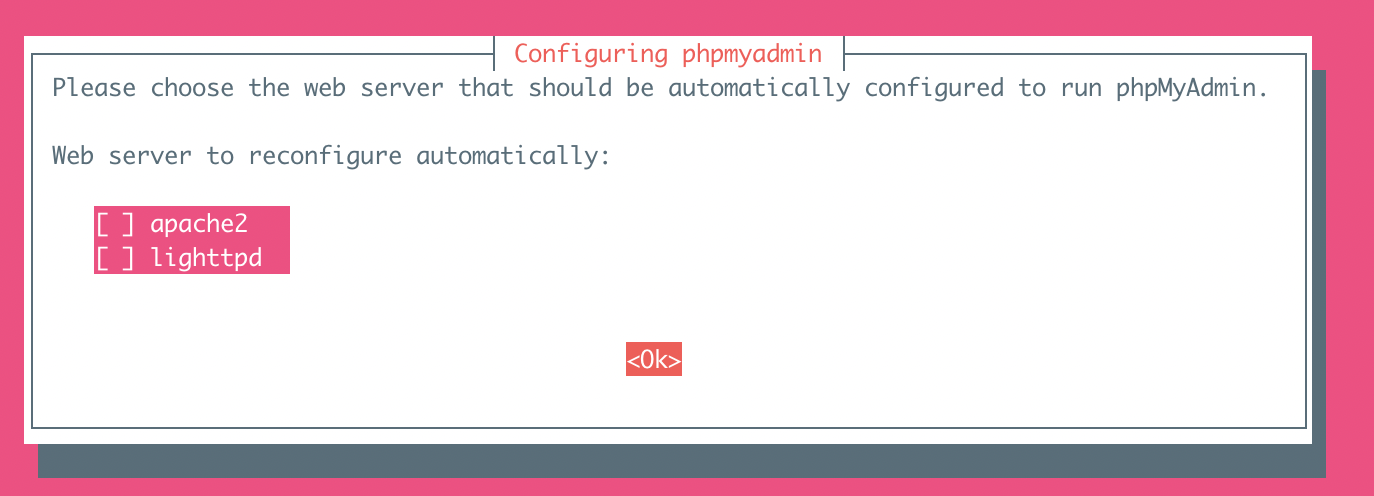
Установим phpmyadmin
apt-get -y install phpmyadmin php-mbstring
В процессе установщик спросит под какой сервер сконфигурировать pma, но из вариантов только apache и lighthttpd, потому ничего не выбираем :
Также просто пропускаем вопрос об установке пароля MySQL application password for phpmyadmin: <— Press Enter
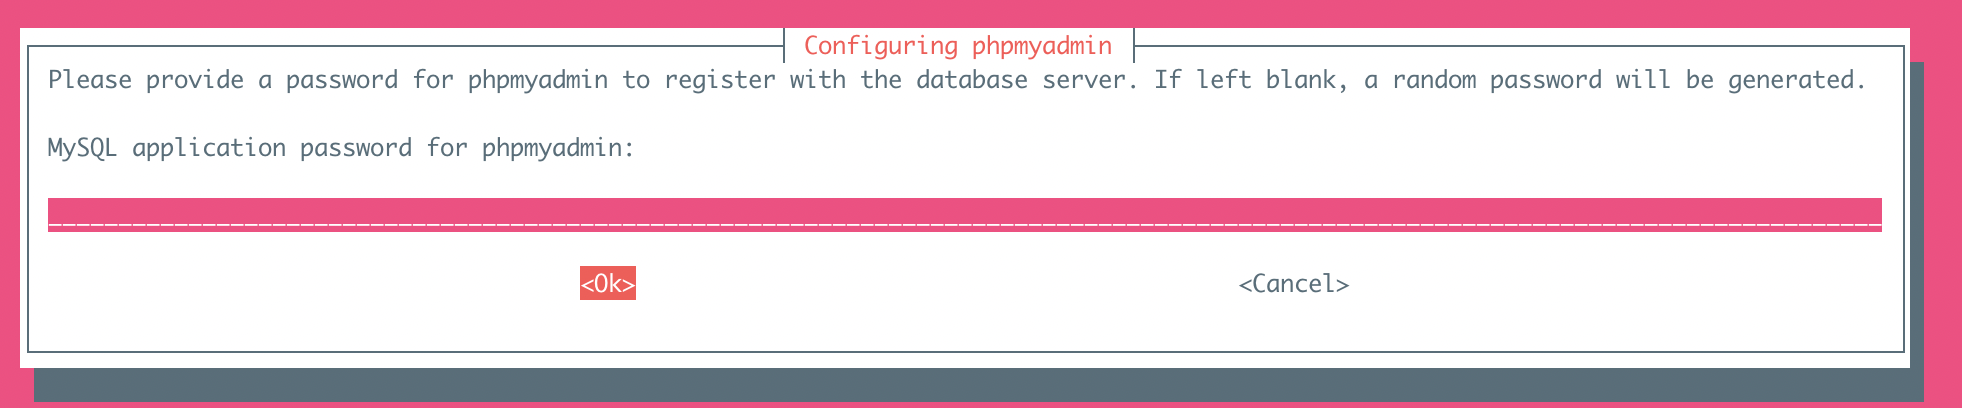
Далее соглашаемся
Configure database for phpmyadmin with dbconfig-common? <— Yes

Установим Let’s Encrypt, PureFTPd и Quota
apt install -y certbot pure-ftpd-common pure-ftpd-mysql quota quotatool
Отредактируем файл /etc/default/pure-ftpd-common и убедимся, что start mode = standalone и VIRTUALCHROOT=true
vi /etc/default/pure-ftpd-common
Включим FTPS командой
echo 1 > /etc/pure-ftpd/conf/TLS
Создадим директорию для сертификатов
mkdir -p /etc/ssl/private/
И сегнерируем сам SSL сертификат
openssl req -x509 -nodes -days 7300 -newkey rsa:2048 -keyout /etc/ssl/private/pure-ftpd.pem -out /etc/ssl/private/pure-ftpd.pem
Поменяем права на файл:
chmod 600 /etc/ssl/private/pure-ftpd.pem
Перезапустим PureFTPd:
service pure-ftpd-mysql restart
Отредактируем файл /etc/fstab. Мой выглядит примерно так (добавляем ,usrjquota=quota.user,grpjquota=quota.group,jqfmt=vfsv0 к корневой точке монтирования):
vi /etc/fstab
/etc/fstab
# /etc/fstab: static file system information.
#
# Use ‘blkid’ to print the universally unique identifier for a
# device; this may be used with UUID= as a more robust way to name devices
# that works even if disks are added and removed. See fstab(5).
#
# <file system> <mount point> <type> <options> <dump> <pass>
# / was on /dev/vda1 during curtin installation
/dev/disk/by-uuid/1ea0d83c-2954-45aa-9e4d-3a80d5fa031f / ext4 defaults,usrjquota=quota.user,grpjquota=quota.group,jqfmt=vfsv0 0 0
/swap.img none swap sw 0 0
Включаем quota:
mount -o remount /
quotacheck -avugm
quotaon -avug
quota
root@ispnginx:~# mount -o remount
quotacheck -avugm
quotacheck: Scanning /dev/vda1 [/] done
quotacheck: Cannot stat old user quota file //quota.user: No such file or directory. Usage will not be subtracted.
quotacheck: Cannot stat old group quota file //quota.group: No such file or directory. Usage will not be subtracted.
quotacheck: Cannot stat old user quota file //quota.user: No such file or directory. Usage will not be subtracted.
quotacheck: Cannot stat old group quota file //quota.group: No such file or directory. Usage will not be subtracted.
quotacheck: Checked 13965 directories and 88306 files
quotacheck: Old file not found.
quotacheck: Old file not found.
root@ispnginx:~# quotaon -avug
/dev/vda1 [/]: group quotas turned on
/dev/vda1 [/]: user quotas turned on
Установим Vlogger, Webalizer, AWStats and GoAccess
apt install -y vlogger webalizer awstats geoip-database libclass-dbi-mysql-perl
Установим последнюю версию GoAccess из репозитория разработчика:
echo «deb https://deb.goaccess.io/ $(lsb_release -cs) main» | tee -a /etc/apt/sources.list.d/goaccess.list
wget -O — https://deb.goaccess.io/gnugpg.key | apt-key —keyring /etc/apt/trusted.gpg.d/goaccess.gpg add —
apt update
apt install goaccess
Откроем файл /etc/cron.d/awstats
vi /etc/cron.d/awstats
И закомментируем все его содержимое
Установим Jailkit fail2ban and UFW
apt install -y jailkit fail2ban
Создадим набор правил
vi /etc/fail2ban/jail.local
/etc/fail2ban/jail.local
[pure-ftpd]
enabled = true
port = ftp
filter = pure-ftpd
logpath = /var/log/syslog
maxretry = 3
[dovecot]
enabled = true
filter = dovecot
action = iptables-multiport[name=dovecot-pop3imap, port=»pop3,pop3s,imap,imaps», protocol=tcp]
logpath = /var/log/mail.log
maxretry = 5
[postfix]
enabled = true
port = smtp
filter = postfix
logpath = /var
Перезапустим fail2ban:
service fail2ban restart
Для установки UFW выполним:
apt install -y ufw
Поставим Roundcube Webmail
apt install -y roundcube roundcube-core roundcube-mysql roundcube-plugins roundcube-plugins-extra javascript-common libjs-jquery-mousewheel php-net-sieve tinymce
Установщик спросит:
Configure database for roundcube with dbconfig-common? <— Yes
MySQL application password for roundcube: <— Press enter


Откорректируем конфигурацию RoundCube config.inc.php:
vi /etc/roundcube/config.inc.php
И поменяем the default host на localhost:
$config[‘default_host’] = ‘localhost’;
Создадим ссылку чтобы использовать конфигурацию SquirrelMail configuration в ISPConfig для Roundcube:
ln -s /usr/share/roundcube /usr/share/squirrelmail
Установим ISPConfig 3.2
Перезапустим nginx
service nginx restart
Скачаем и запусти установщик с помощью команд:
cd /tmp
wget -O ispconfig.tar.gz https://www.ispconfig.org/downloads/ISPConfig-3-stable.tar.gz
tar xfz ispconfig.tar.gz
cd ispconfig3*/install/
php -q install.php
Установка выполняется согласно подсказкам установщика:
процесс установки
root@ispnginx:/tmp/ispconfig3_install/install# php -q install.php
———————————————————————————
———————————————————————————
>> Initial configuration
Operating System: Ubuntu 20.04.2 LTS (Focal Fossa)
Following will be a few questions for primary configuration so be careful.
Default values are in [brackets] and can be accepted with <ENTER>.
Tap in «quit» (without the quotes) to stop the installer.
Select language (en,de) [en]:
Installation mode (standard,expert) [standard]:
Full qualified hostname (FQDN) of the server, eg server1.domain.tld [ispnginx.cat-a.ru]:
MySQL server hostname [localhost]:
MySQL server port [3306]:
MySQL root username [root]:
MySQL root password []:
MySQL database to create [dbispconfig]:
MySQL charset [utf8]:
Configuring Postgrey
Configuring Postfix
Generating a RSA private key
…………………++++
…………………………………………………………………………………………………………………………………………………………………………++++
writing new private key to ‘smtpd.key’
——
You are about to be asked to enter information that will be incorporated
into your certificate request.
What you are about to enter is what is called a Distinguished Name or a DN.
There are quite a few fields but you can leave some blank
For some fields there will be a default value,
If you enter ‘.’, the field will be left blank.
——
Country Name (2 letter code) [AU]:RU
State or Province Name (full name) [Some-State]:Spb
Locality Name (eg, city) []:Spb
Organization Name (eg, company) [Internet Widgits Pty Ltd]:cat-a
Organizational Unit Name (eg, section) []:it
Common Name (e.g. server FQDN or YOUR name) []:ispnginx.cat-a.ru
Email Address []:admin@cat-a.ru
[INFO] service Mailman not detected
Configuring Dovecot
Creating new DHParams file, this takes several minutes. Do not interrupt the script.
Configuring Spamassassin
Configuring Amavisd
[INFO] service Rspamd not detected
Configuring Getmail
Configuring Jailkit
Configuring Pureftpd
[INFO] service BIND not detected
[INFO] service MyDNS not detected
Configuring nginx
[INFO] service OpenVZ not detected
Configuring Ubuntu Firewall
[INFO] service Metronome XMPP Server not detected
Configuring Fail2ban
Installing ISPConfig
ISPConfig Port [8080]:
Admin password [fb07e95d]:
Do you want a secure (SSL) connection to the ISPConfig web interface (y,n) [y]: y
Checking / creating certificate for ispnginx.cat-a.ru
Using certificate path /etc/letsencrypt/live/ispnginx.cat-a.ru
—2021-05-29 05:51:24— https://get.acme.sh/
Resolving get.acme.sh (get.acme.sh)… 104.21.34.62, 172.67.199.16, 2606:4700:3031::ac43:c710, …
Connecting to get.acme.sh (get.acme.sh)|104.21.34.62|:443… connected.
HTTP request sent, awaiting response… 200 OK
Length: unspecified [text/html]
Saving to: ‘STDOUT’
— [ <=> ] 937 —.-KB/s in 0s
2021-05-29 05:51:25 (3.73 MB/s) — written to stdout [937]
Installed acme.sh and using it for certificate creation during install.
Using nginx for certificate validation
acme.sh is installed, overriding certificate path to use /root/.acme.sh/ispnginx.cat-a.ru
Symlink ISPConfig SSL certs to Postfix? (y,n) [y]: y
Symlink ISPConfig SSL certs to Pure-FTPd? Creating dhparam file may take some time. (y,n) [y]: y
Generating DH parameters, 2048 bit long safe prime, generator 2
This is going to take a long time
…………………………………………..
Configuring Apps vhost
Configuring DBServer
Installing ISPConfig crontab
no crontab for getmail
Detect IP addresses
Restarting services …
Installation completed.
root@ispnginx:/tmp/ispconfig3_install/install#
После установки наша панель будет доступна на 8080 порту. Авторизуемся, используя пароль, указанный при установке:


ссылка на оригинал статьи https://habr.com/ru/post/565138/
Добавить комментарий