Поэтому я решил сделать на нем пару игр. А начать с самого простого — с шутера. Ну и заодно объяснить, как делаются игры на этом замечательном движке.
Итак, начал я с создания нового пустого проекта и изменил начальный экран игры. Это по стандарту файл Base\UI\Screens\SplashScreen.ui и его cs файл.
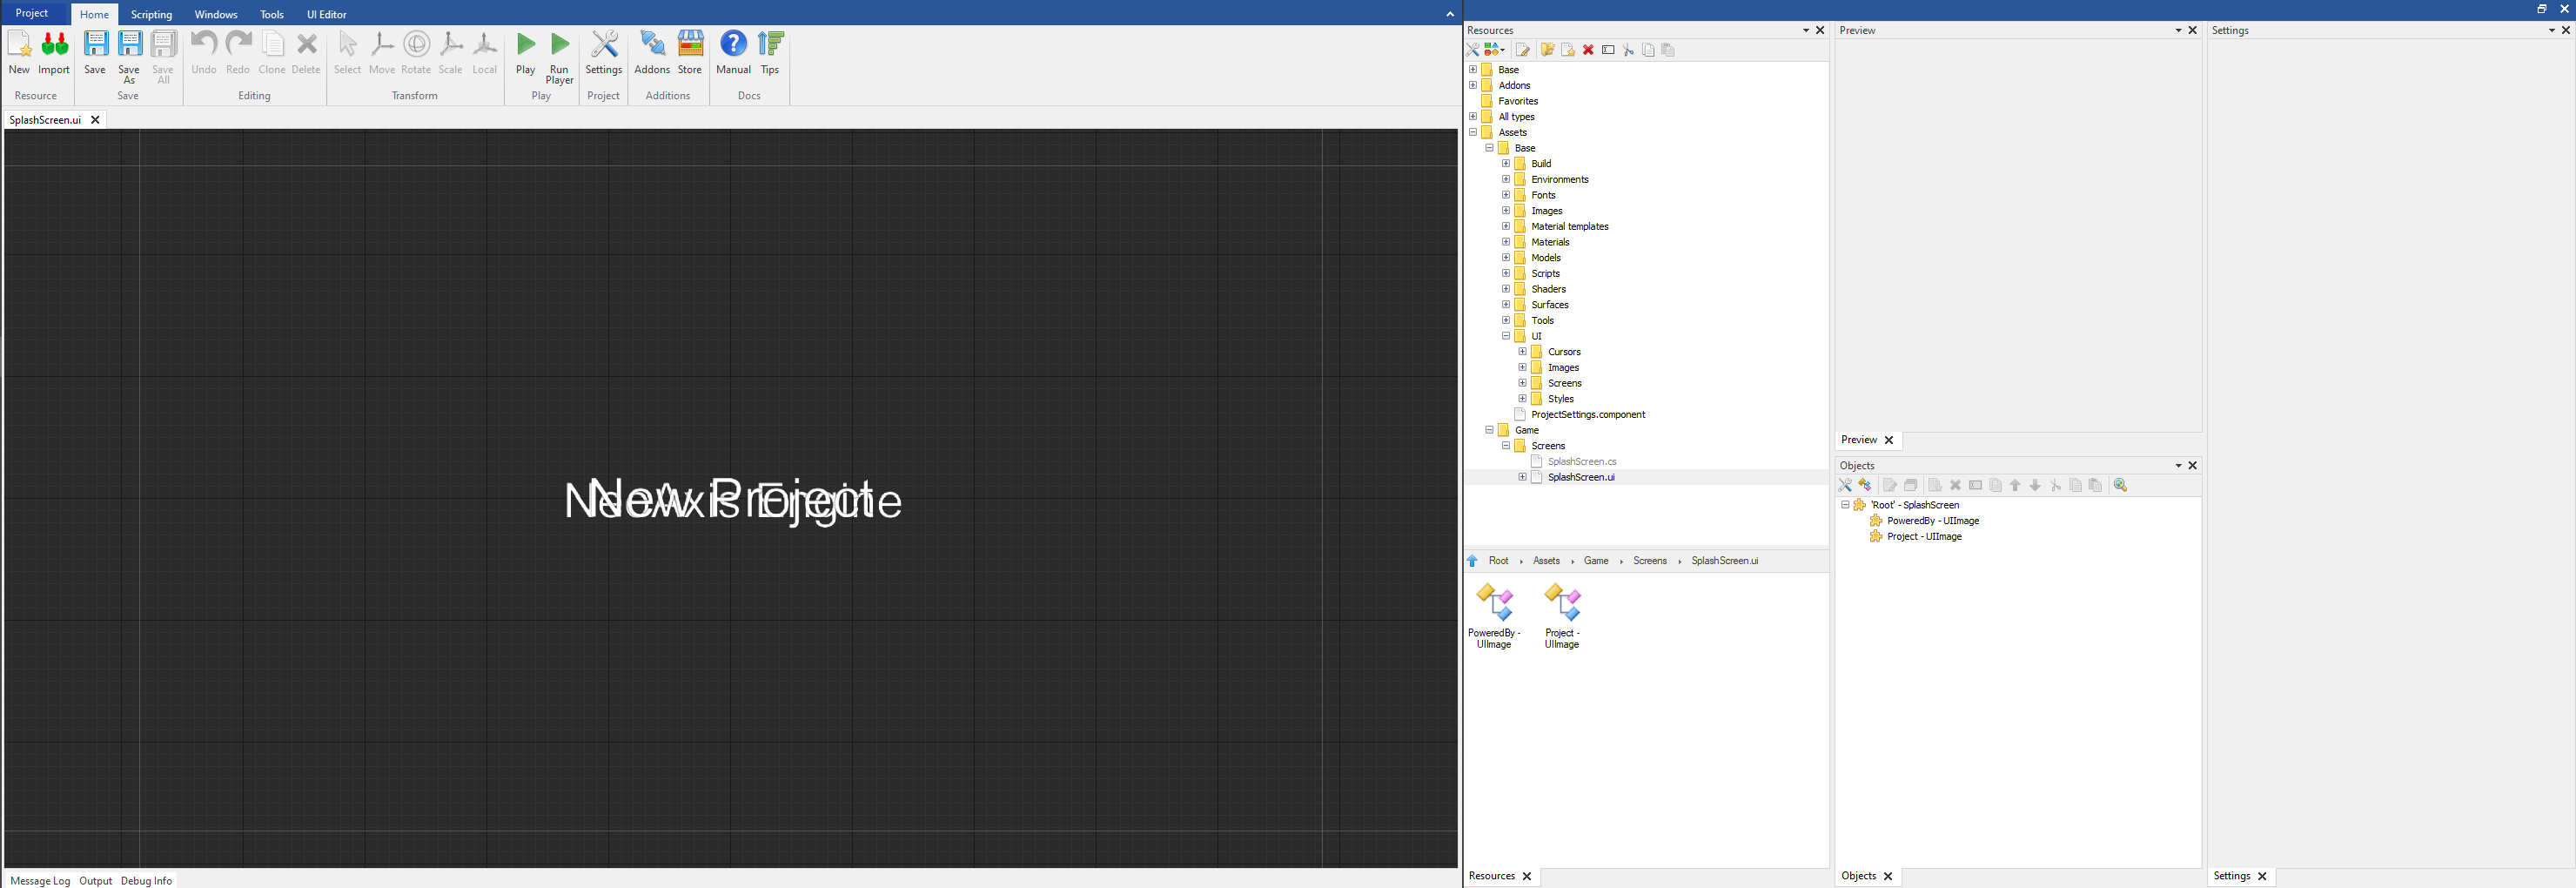
В UI просто убрал картинку, отвечающую за название проекта при загрузке (Project). C# файл пришлось больше изменять, убирая из него все, что связанно с той картинкой.
Итоговый вариант C# файла:
public class SplashScreen : UIControl { bool gotoMainMenu; bool gotoMainMenuUpdated; [Serialize] [DefaultValue( 2.0 )] public double PoweredByTime { get; set; } = 2.0; [Serialize] [DefaultValue( 0.5 )] public double FadingTime { get; set; } = 0.5; protected override void OnEnabledInSimulation() { PreloadImage(); ResetCreateTime(); } void PreloadImage() { if (Components["PoweredBy"] is UIImage image) { var v = image.SourceImage; } } protected override void OnUpdate( float delta ) { base.OnUpdate( delta ); if( EngineApp.ApplicationType == EngineApp.ApplicationTypeEnum.Simulation ) { if( gotoMainMenuUpdated ) { SimulationApp.ChangeUIScreen( @"Game/Screens/MainMenu.ui" ); EngineApp.ShowCursor = true; } if( Time > GetTotalTime() ) gotoMainMenu = true; } } double GetTotalTime() => 1.0 + FadingTime + PoweredByTime + FadingTime + 1.0 + FadingTime; void GetImagesTransparency( out double poweredBy, out double project ) { var curve = new CurveLine(); curve.AddPoint( 0, new Vector3( 0, 0, 0 ) ); curve.AddPoint( 1.0, new Vector3( 0, 0, 0 ) ); curve.AddPoint( 1.0 + FadingTime, new Vector3( 1, 0, 0 ) ); curve.AddPoint( 1.0 + FadingTime + PoweredByTime, new Vector3( 1, 0, 0 ) ); curve.AddPoint( 1.0 + FadingTime + PoweredByTime + FadingTime, new Vector3( 0, 0, 0 ) ); curve.AddPoint( 1.0 + FadingTime + PoweredByTime + FadingTime + 1.0, new Vector3( 0, 0, 0 ) ); curve.AddPoint( 1.0 + FadingTime + PoweredByTime + FadingTime + 1.0 + FadingTime, new Vector3( 0, 1, 0 ) ); var value = curve.CalculateValueByTime( Time ); poweredBy = MathEx.Saturate( value.X ); project = MathEx.Saturate( value.Y ); if( gotoMainMenu ) { poweredBy = 0; project = 0; } } void UpdateImagesTransparency() { GetImagesTransparency( out var poweredBy, out var project ); if (Components["PoweredBy"] is UIImage image) image.ColorMultiplier = new ColorValue(1, 1, 1, poweredBy); } protected override void OnRenderUI( CanvasRenderer renderer ) { if( EngineApp.ApplicationType == EngineApp.ApplicationTypeEnum.Simulation ) UpdateImagesTransparency(); base.OnRenderUI( renderer ); if( EngineApp.ApplicationType == EngineApp.ApplicationTypeEnum.Simulation ) { if( gotoMainMenu ) gotoMainMenuUpdated = true; EngineApp.ShowCursor = false; } } }
Также я заменил файл PoweredBy, изменив его на свое изображение сделанное в фотошопе.
(Лично по моему это отличное решение, наша картинка выглядит гораздо лучше чем изначальная)

Следующий шаг — изменение дизайна UI, вынужден признать, это заняло достаточно времени.
(Кстати, если кому-то нравится изначальный синий вариант ui — я не спорю. Просто он раздражает лично меня.)
Изменял я скопированный Base\UI\Styles\Simple.uistyle и его C# файл.
Это оказалось не совсем быстро и просто.

После того, как более-менее настроил стиль ui, изменил его в ui главного меню.

Получилось достаточно красиво, после синего стиля этот серый вообще стал для меня идеалом)
Замечательно, но с ui ещё не закончили.
Сделал PlayScreen, это окошко для выбора уровня:

А вот и код её C# файла:
public class PlayWindow : NeoAxis.UIWindow { protected override void OnEnabledInSimulation() { const string V = "ExitBtn"; if (Components[V] != null) ((UIButton)Components[V]).Click += Exit; const string V1 = "Play_1"; if (Components[V1] != null) ((UIButton)Components[V1]).Click += Play; const string V2 = "Play_2"; if (Components[V2] != null) ((UIButton)Components[V2]).Click += Play; const string V3 = "Play_3"; if (Components[V3] != null) ((UIButton)Components[V3]).Click += Play; } protected void Exit(UIButton sender) => EngineApp.NeedExit = true; protected void Play(UIButton sender) { var playFile = ""; switch (sender.Name) { case "Play_1": playFile = @"Game\Scenes\1\level.scene"; break; case "Play_2": playFile = @"Game\Scenes\2\level.scene"; break; case "Play_3": playFile = @"Game\Scenes\3\level.scene"; break; } if (SimulationApp.ChangeUIScreen(@"Game\Screens\PlaySys.ui")) { if (SimulationApp.CurrentUIScreen is PlaySys playsys) { playsys.Load(playFile, true); playsys.ResetCreateTime(); } } } protected override bool OnKeyDown(KeyEvent e) { if (e.Key == EKeys.Escape) { Dispose(); return true; } return base.OnKeyDown(e); } }
Обращу внимание на строку «SimulationApp.CurrentUIScreen is PlaySys playsys«.
PlaySys это файл загрузки сцены, я скопировал его из Base\UI\Screens\PlayScreen.ui ну и его c# файл.
Все. Мы успешно закончили возиться с основной UI в этой игре. Правда осталось окошко паузы… Но его оставим на потом. Во второй части разберем создание уровня для шутера.
Спасибо за прочтение!
ссылка на оригинал статьи https://habr.com/ru/articles/757044/
Добавить комментарий